Last modified: 2024-05-22 19:55:57
< 2024-05-10 2024-05-20 >I think the plan today is:
New screws in:
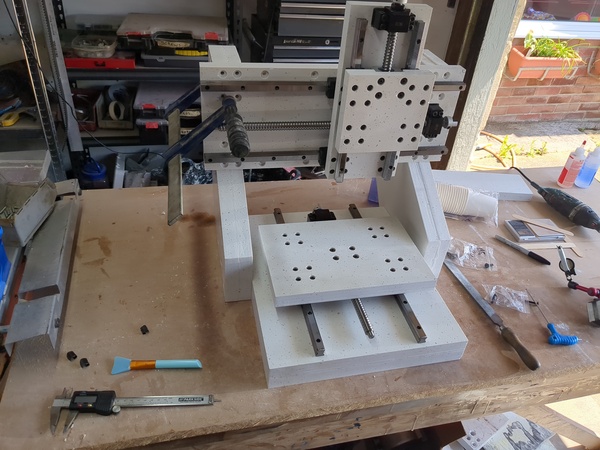
And all 3 axes move nicely. At this point it's worth thinking about how to make sure they're all perpendicular.
I think the Y axis we can just take as-is. Then the X axis needs to travel perpendicular to it. Then the Z axis needs to travel perpendicular to the X axis, plus we need to tilt the gantry forward/backward so that Z is also perpendicular to Y. And then we need to tilt the spindle mount forward/backward/left/right so that the spindle axis is parallel to Z.
So to make X perpendicular to Y we can shim the gantry forwards at either the left or right end.
To make Z perpendicular to X we can loosen the bolts and shift it about on the X carriages.
To make Z perpendicular to Y we can shim the gantry up/down at either the left or right.
To make the spindle parallel to Z we can machine the spindle mount accordingly, or just shim it to start with.
And then we're golden? That's all the alignment that is needed?
Given that I won't be adjusting the gantry uprights to align the machine, it's tempting to epoxy them on final assembly. Or at least add some alignment pins so that if I do ever take it apart again I can get it back together without ruining the alignment.
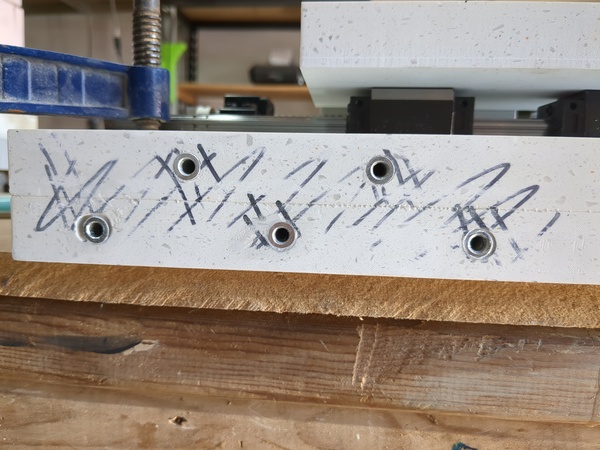
Filed down the inserts for the gantry uprights:
Lol:

The baseplate doesn't cover the rear mounting holes, oops.
OK then, new plan: I'll plug up the existing mounting holes and drill new ones. I can drill them in the baseplate first, then transfer downwards onto the laundry basket, then drill through the basket & metal table, and then bolt it down.
This will work better than reusing the existing holes, because I can put them in more advantageous places.
Well I messed up the placement of the front holes. I marked them so they were nicely within the flat area at the bottom of the laundry basket, but I forgot that the basket overhangs the steel table by quite a long way, so the holes would have missed the table.
So now I have 2 holes in the baseplate that want plugging up as well. I'll plug them with epoxy/Minerva mix next time I am epoxying.
But I drilled a second set of front holes in the baseplate, and I've transferred the holes to the laundry basket, and drilled holes in the basket & stand. And they line up acceptably, great success, I can get M8 bolts through the holes.
One annoyance is that I have to move the table back and forth to access the bolts, because there is no position where the table doesn't cover either the front or the back bolts.
I've put the uprights back on, and now that the inserts are filed down the uprights stand vertical without any fussing about with the bolt tensions. Better.
I think before transferring gantry bolt hole positions I should try to work out how much it's going to need shimming, so I can work out if I need to compensate for the shim in the hole locations.
I think the gantry needs lifting up at the left hand side by 0.3mm to 0.5mm. That is a bit too much to try and take up with play in the bolt holes, so I think I will shim up the left hand side before transferring the holes.
< 2024-05-10 2024-05-20 >