Last modified: 2026-10-24 14:29:38
< 2026-10-23Imagebin is PHP, as per https://incoherency.co.uk/blog/stories/the-story-of-max.html but due to the recent php2shell I have disabled PHP which means I can't upload any more pictures, very annoying.
I think probably easier to replace with something non-PHP now, but what? Ideally just a drop-in replacement using the existing filesystem storage etc., but allowing bulk-upload.
I guess get codex on the case.
OK, done, got a go version now. I should also update the blog post to admit to this.
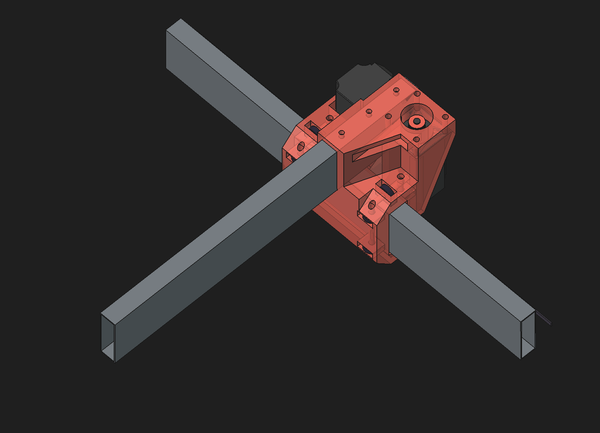
I have this for the X axis carriage. Both motors are mounted to this carriage so can share cable routing. X axis moves with an omega drive, Y axis will move with a normal looped belt.
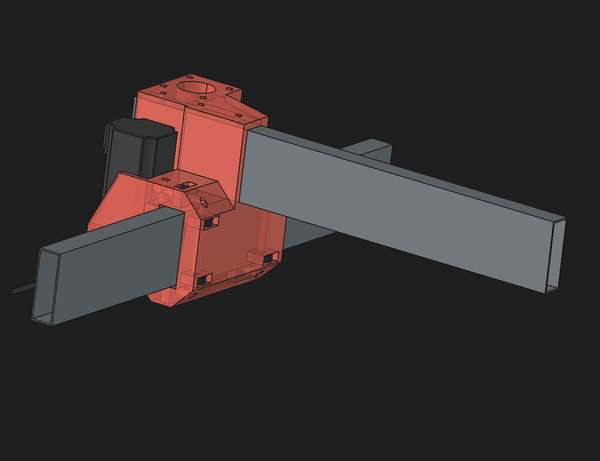
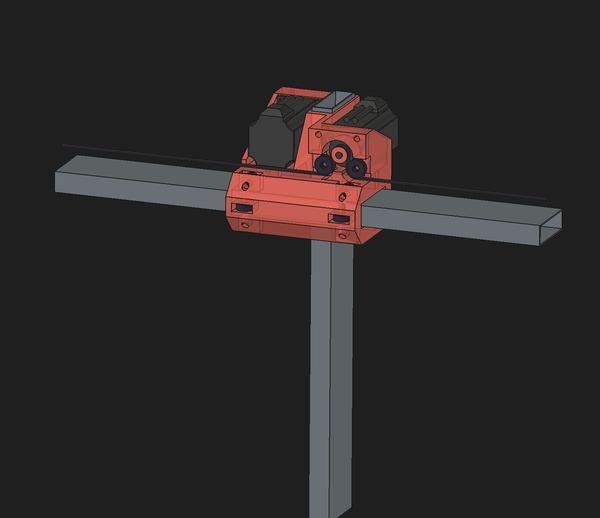
The motor mounting holes are sized for M5 threaded inserts.
The bearing wheels are to go on 8mm rods, the holes are sized in CAD to 8.0mm, they will get printed undersized I expect and I can drill them out of required.
The Y rail is meant to be a tight fit in the rectangular hole, I have made it 0.1mm over-sized in CAD, will get printed undersized I expect, and I can maybe heat up the plastic to get the rail in if necessary, or hammer it in. There are 3 holes on top for me to put self-tapping screws in to hold the rail firmly in place.
The idlers for the omega drive have mounting holes sized for tapping M8.
The bearing wheels mostly have short standoffs next to them to keep the outer races from rubbing, but I've omitted these in a few places where either it would mean annoying supports are required or else it broke the model in FreeCAD for reasons I don't understand. I can use washers if necessary.
So that's motors, bearing wheels, idlers, Y rail. What else? There appears to be plenty of clearance for both the X belt and the Y belt.
I think I am OK to print this now?
In "0.20mm STRENGTH" setting it is going to be a 24-hour print in ABS-GF and use 700g of filament. I have a roll of orange ABS-GF which I bought for making the orange ramp on the car ramp toy and haven't used for anything else, so I guess use that up on this.
If it doesn't work then it will be annoying to have used up almost an entire spool, I guess let's just try it and see what happens.
I'm going to put down a good layer of glue on the bed, and also do a good purge of the nozzle, no point having it fail due to poor adhesion from having a bit of the wrong plastic on the first layer.
It may end up taking more than 24 hours if I switch it to silent mode overnight. In fact I may switch it to silent mode straight away as i have previously noticed the speed change can change the surface texture.
OK, it's 48 hours in silent mode. See you in 2 days.
The good news is I ought to have time to design the rest of the machine before this is done printing.
X axis belt tensioning is by trapping the belt inside a piece of plastic, and then the plastic slides in a square hole, with 5mm of range, with a M6 bolt threaded into it.
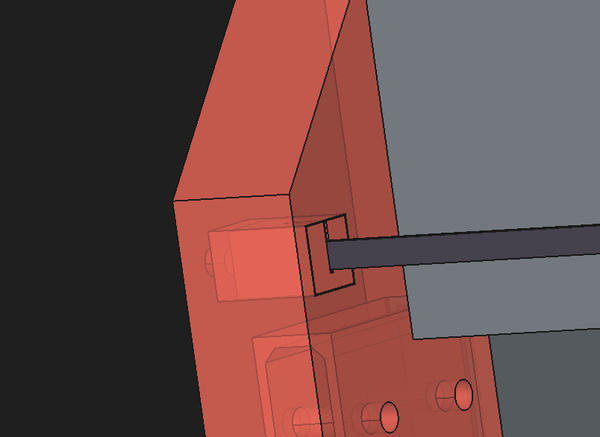
Tighten up the M6 bolt to tighten the belt. That's not a lot of range of adjustment which will be annoying but meh, just have to cut the belt to quite an accurate length. And I will mirror this for the other side so we really have 10mm range between the two.
Legs are 40x20 box section pressed into the X rail end caps:
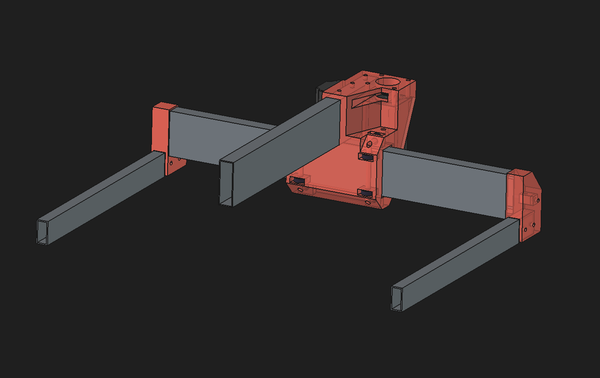
So that's the X axis fully done, next is Y carriage, Y end stop with (probably adjustable) idler pulley, and torch clamp with manual Z axis.
< 2026-10-23