
Last modified: 2024-04-16 13:45:30
< 2024-04-15 2024-04-19 >First job:
This is much more trouble than expected. I've made an improvement, but you could do better.
Easy.
Okey dokey...
I'm using three plastic bobbins to lay out 3 points to define the coordinate system.
I did op2 for the X carriage first:
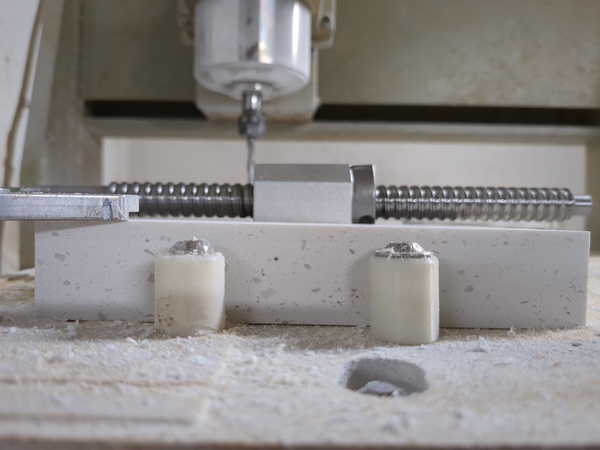
But I forgot that the table has been levelled in the centre but not the sides, and the way this is clamped means the right hand side is lower than the left, so as you can see the lead screw is not parallel to the part. Need to fix this, re-zero Z, re-cut it, and see how it looks.
I may need to make the hole extra deep and then put a spacer in there.
But for now, solutions for levelling the part include:
I can't be bothered re-surfacing the table. It needs a new wasteboard soon anyway as there is not much more material I can take off it before hitting the mounting bolts, and some of the MDF has been damaged by repeated tightening. So I'm hoping to be able to pack something underneath it to make up the height.
I put some of the aluminium fins from the cut-up heatsink underneath, and jogged the tool around to ensure it is an equal distance away from the surface throughout the area that I care about.
Much better:
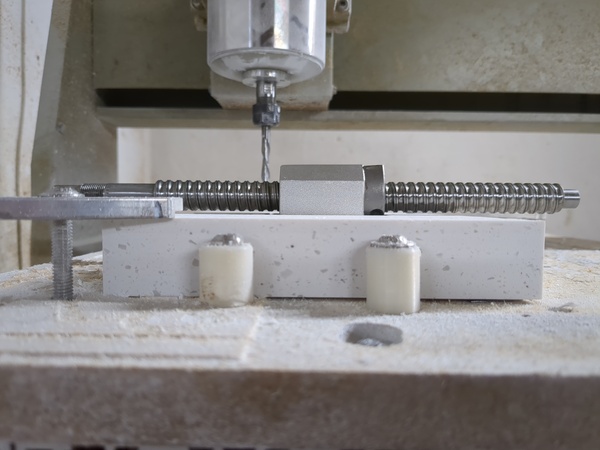
So that's the X carriage done! Good. Now the table.
I found that the ballnut holder wouldn't fit in the pocket. I ran the job again and it took some more off but it was still a very tight fit. Even though both CAD and CAM are basically identical to the one on the first job. It feels like there is some play in the spindle bearings, not good. I'm guessing my spindle rebuild was not up to par. This may be the reason for the "layer lines" from the first operation.
There is almost 1mm of axial play, although it is spring-loaded upwards so it's not as bad as it could be, especially given that I am using an up-cutting tool.
I do wonder if, given that the first job today seems fine, the problem might go away if I let the spindle cool down.
Also, the floor of the second pocket in this job was much rougher than the other ones today, so maybe something came loose during that. Should I have put Loctite on the preload nut?
Since the pockets I'm doing today are only to provide clearance in X/Y, I don't actually care if they're not quite the right size as long as they're the right depth (which they still are), so I think I'll just add an extra 0.5mm clearance to them and carry on.
That did the trick for the table. Just the Z plate to go.
Great success, all done.
The next step was meant to be cleaning dust off and gluing in threaded inserts, but I actually think I want to glue together the doubled-up parts before fitting threaded inserts.
Either way I'm going to need more epoxy, so I'll stop for now and order some epoxy.
I've gone for this: https://www.ebay.co.uk/itm/193140499926
30 minute working time, and described as "high strength".
< 2024-04-15 2024-04-19 >