Last modified: 2024-03-23 16:01:21
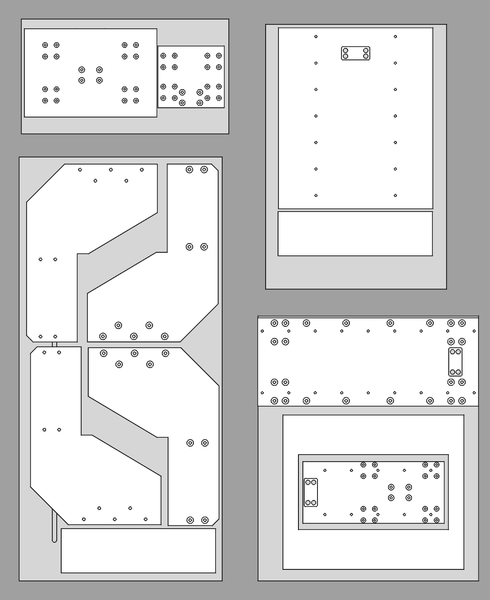
< 2024-03-21 2024-03-24 >I've laid out the latest parts on the material in CAD and verified it still fits.
Just needed to add bolt holes for Y rails.
Some of these parts need machining on both sides, but that won't be too much trouble.
Plan:
Firstly I need to install the new ballnut seals. Straightforward enough, they still seem a bit on the tight side, but at least I can actually turn them by hand now.
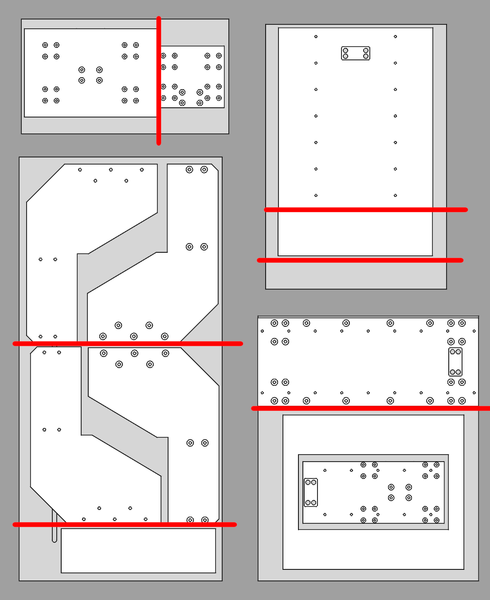
I've done all the cuts in red above, so now on to CAM. Let's start with the smallest part, that would be the Z plate.
The CAD of this part doesn't yet have the holes to attach the spindle clamp. Let's worry about that later.
Doing the smallest part first is good because if I fuck it up I have enough spare material to make another.
What sort of end mill do you use for this? Maybe a 6mm 2-flute down-cutting bit?
Feeds & Speeds tool suggests starting at 8000 rpm and 2000 mm/min feed rate, with 3mm depth of cut, full slotting. Let's give it a go...
I think do a first job with clamps to put the holes in place, then bolt it down through the holes, then remove the clamps and run the outer profile.
Also this is the first time I've used the CNC router since I reassembled this spindle motor, and I recall it was getting warm quite quickly when I tested it, so need to watch out for it overheating.
The first job was just the counterbores for the holes. It went very well, didn't make nearly as much dust as the tablesaw did, was more making chips. It didn't actually reach 2000 mm/min, but at least I have learnt that 8000 rpm and 1000 mm/min makes an acceptable chip.
To make the actual holes I need to use a smaller tool. I never know what to do for this sort of thing:
I think I'll look for a small end mill to do it with. My 3mm tools have 1/8 inch shanks and aren't long enough. I'm going to try with a 4mm 4-flute up-cutting tool. Tool says 12000 rpm, 1100 mm/min, 2mm depth of cut, full slotting.
Also, I need to remember to do all the CAM on the garage computer so that I'm not constantly walking back and forth between garage and office.
The 4mm up-cutting tool seemed to work fine. This stuff cuts very easily on the CNC router, so far there is much less mess, noise, and dust compared to using the tablesaw, circular saw, or handheld router.
First part, first op, complete:
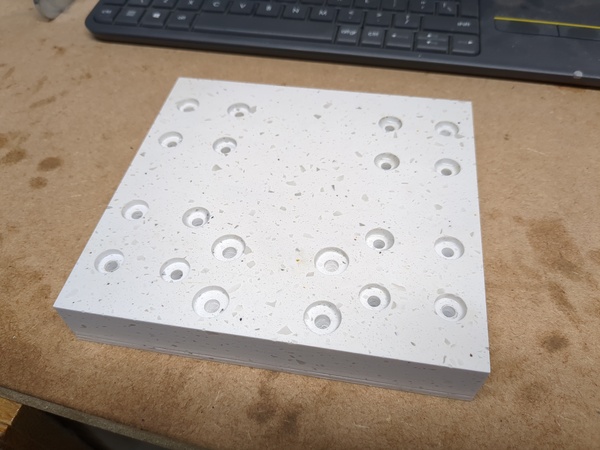
(Z plate). It still needs a cut-out on the underside for the ballnut holder.
It worked well at 8000 rpm, 2000 mm/min, 3mm depth-of-cut, full slotting, with the 6mm 2-flute down-cutting bit. Could probably push it harder. Also the spindle motor is not getting hot, which is good.
So now I know the process, just need to repeat it for the other parts.
I'll do the gantry back pieces next, they're pretty trivial, just rectangles. It's worth using the CNC router anyway though because it gives much better finish, and much more precise dimensions, compared to the tablesaw.
And I'll try 4mm depth-of-cut.
4mm depth-of-cut worked well, I now have both gantry back pieces.
I wish I hadn't written on these parts in Sharpie, it is proving very difficult to clean off.
I've collected a bunch of the dust, to potentially mix with epoxy to make a filler.
Next up, maybe the table? I'll do the holes in a first job, then the counter-bores and the outline in a second. I think the technique of screwing it down through the holes is not necessary.
Great success, easy peasy. I really like this material, it is very easy to cut. Even less trouble than plywood really.
The 2 gantry back pieces are done, and the Z plate & table are both done for the first side, they still need some pockets on the bottom.
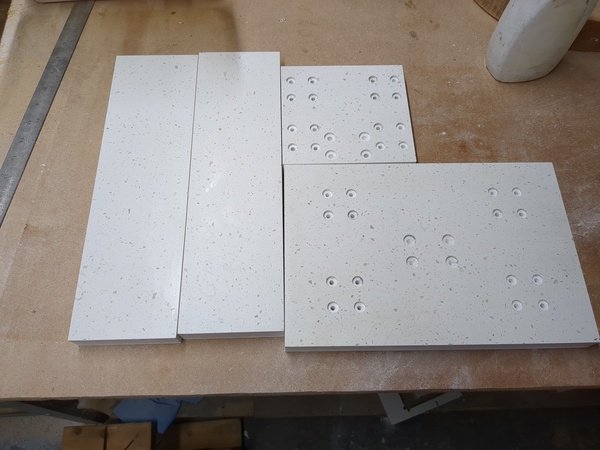
Still need to make:
The uprights will be the hardest as I think they are the only ones where the material I have prepared won't fit on the router table.
< 2024-03-21 2024-03-24 >