Last modified: 2023-12-28 21:36:20
< 2023-12-27 2023-12-29 >So the plan today is to put a hub in the thin barrel, and if I still have problems then consider screwing the cap on.
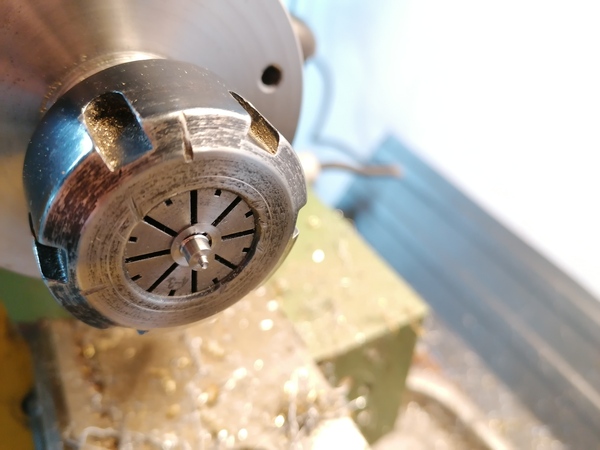
Oops:
The hub is so thin that the undercut trepans it out. I need to be putting the undercut on the shaft rather than the face.

Now needs a slot machining in it for the spring to hook into.
Just noticed the bore isn't concentric because I was too lazy to centre-drill it. Must buy a tiny centre drill.
One end is a nice 4.0mm shaft but the other is just a bit over 3.8mm.
I'm going to machine the hook using the collet chuck on the CNC router.
Nice:
I didn't pack out the back of the collet, so it is only gripping on about the front 1mm.
Next up: drill the barrel out to 4mm.
I used the pillar drill, it seems to have worked well enough. I first opened the hole up to 3mm to see how it would go, and it seemed OK, so then I used the 3.9mm drill bit. The 3.8mm end of the hub fits in the hole but the 4.0mm end does not, so this looks to be a reasonably accurate way to drill holes of this size.
I used the 4H7 reamer to open up the 3.9mm hole to 4.0mm and now it fits nicely.
With the barrel halves snapped together it no longer turns freely. Is this because one or other of the barrel bores is not concentric with the snap-fit?
I noticed the hub is not seating nicely against the flat surfaces, because of the radius in the root, so I've put a healthy chamfer on the inner surface of each of the barrel parts.
I think the issue is that the hub is thicker than the gap between the barrel surfaces, so when the barrel is snapped together there is no clearance for it to rotate.
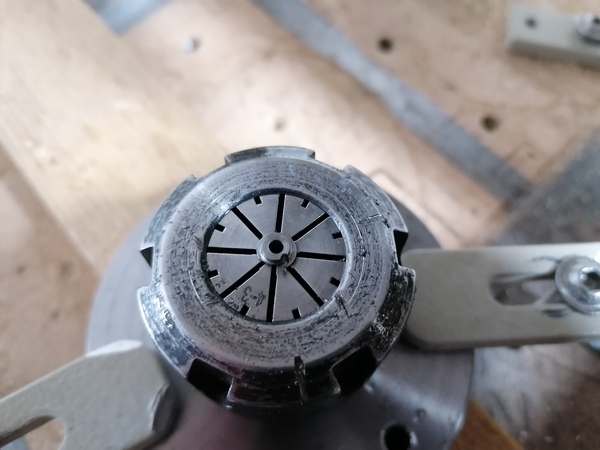
The ER32 collet chuck has arrived, so I'm going to try to fit that one on the lathe, and use it to shave a tiny amount off one side of the hub. I measured it at 0.35mm which is the same as the spring.
The hole in the outside of the ER32 collet chuck to grab it for tightening/loosening is not very convincing. I may try drilling deeper ones using the 4th axis.
Well it worked but I definitely need to do something about the holes for grabbing the collet chuck.
The hub now measures 0.30mm, the spring is 0.35mm so there should definitely be clearance.
Still too tight to turn :(. So maybe it is a hole concentricity issue after all. Yes, it is hole concentricity. By snapping the barrel parts together with no hub inside I can see that the holes don't line up perfectly. So now what?
Firstly, work out which one doesn't have the hole in the middle. Can't work it out, too hard to measure. I'm just going to drill them out by 0.1mm, one at a time, until it runs freely.
Great, got it running freely with both pieces drilled out to 4.1mm. Now I need to Loctite the hub onto a shaft.
Yes mate:
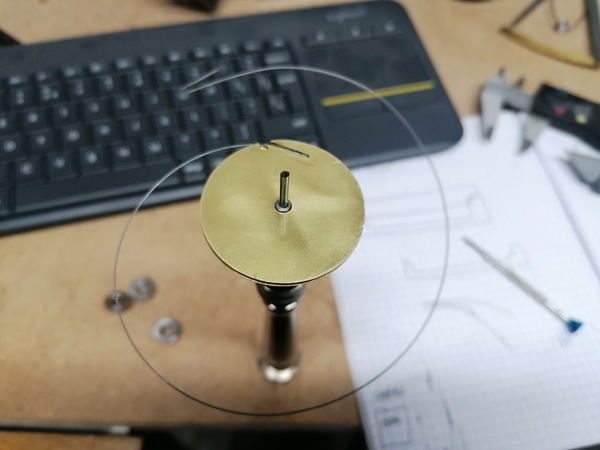
I used the 2mm hole in the die block to hold the shaft perpendicular for Loctiting, with the predictable drawback that I glued the shaft into the hole. I pulled it loose just as the glue was setting though, seems to have worked.
Hooking the spring onto the barrel was slightly fiddly, but not as bad as a traditional barrel. I'm going to give the Loctite a few more minutes to cure and then try winding this up.
First impression is good, although it doesn't have a lot of torque for the first few turns. I probably need either a longer wire or a thicker wire, probably both.
I want to machine a slot in the barrel cap so that I can see how tightly the spring is wound.
I'm going to see how many turns I can put on it, and what the failure mode is when fully tightened. Previously it failed by the inner coils riding over each other, but I think the hub will make that less likely because they won't be so tight.
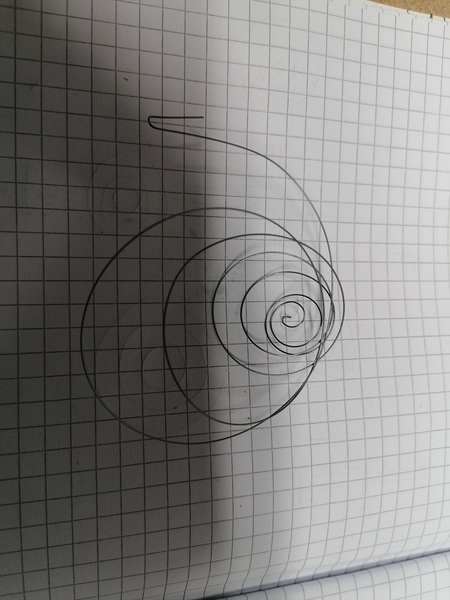
After about 6.5 turns the barrel popped open. The spring looks good though, no overlapped coils.
Although it's not exactly planar. Not sure if this is because of the damage caused to the spring from all the previous blundering about with it, or if this is a fundamental problem of the "thin barrel" design.
I tried again and it got tight and then bound up at about 5 turns, and I tried to rotate it back and forth and then the top popped off and the spring flew into the air. So I think at 5 turns it is fully wound, and the only way it can get tighter is by the coils riding over each other. And that is no longer able to happen so it pings the barrel open. Good, I think.
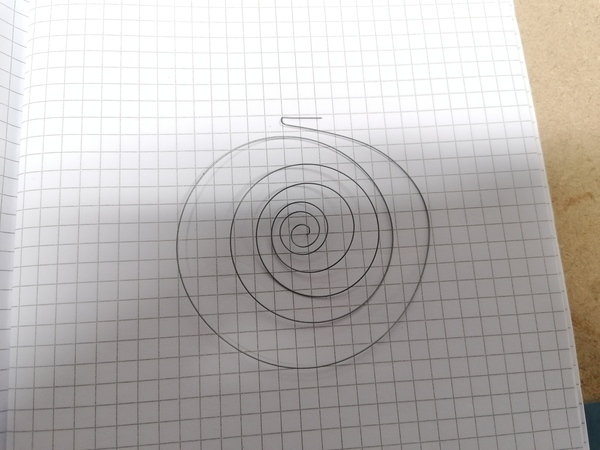
Interestingly the spring has tangled itself up:
There is no obvious damage to the inside of the barrel, which is good.
Since the barrel keeps popping open I think it would be worth making the next one screw shut.
This spring looks to have 6.5 turns in the fully relaxed state, and it takes probably 2 or 3 turns to wind it all into the barrel, and then 5 turns to make it tight. So in total there are probably 14 coils when it is fully wound.
The hub is 6mm and the diameter of the space for the spring is 34mm, which gives 14mm for coils on each side, so we could fit 14/0.35 = 40 coils in total.
At an average diameter of 20mm, 40 coils would require 2.5m of wire.
I'm going to try to modify the barrel so that 3 screws can keep it shut, and then wind a fresh spring from a 1-metre length of wire, because I am aware that I have cut some off this existing wire several times.
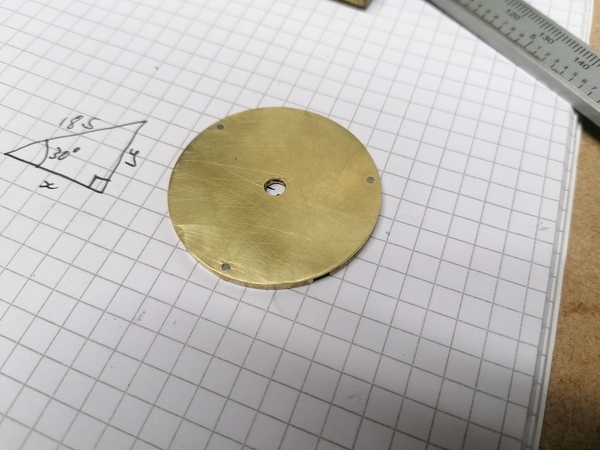
I'll try to do this the old-fashioned way. How do you divide a circle into thirds? Meh, let's try trigonometry.
I know my holes are going on a 37mm diameter. One hole is at (0,-18.5). The others are at negative and positive
x coordinates where:
x = 18.5 cos 30 = 16.02y = 18.5 sin 30 = 9.25I used the 1.2mm PCB drill in the pillar drill to make the hole for the thread, and a 1.8mm ordinary drill in the 14.4v cordless drill to make the clearance hole, and the 6mm 90 degree chamfering tool in the pillar drill to countersink the heads.
I should have used the CNC machine, might have had half a chance of dividing it accurately. What I've done is OK-ish, but only goes together in one orientation.
I ground off the screws then filed and sanded flush:

Great success. Now let's wind it and count the turns and note the failure mode, first with the existing spring.
I got the spring inside and tightened the screws up, and now the shaft can't turn. I wonder if there is actually not enough space for the spring, and the screws pull it tight enough to bind? I'll back the screws off and see if it frees up. Yes, that seems to have done the job.
Now, counting the turns...
I expect the failure mode will be that it forces the coils to ride over each other and bind up.
At 5 turns it got tight, I kept going and now it is bound up, it doesn't unwind on its own. I opened it up but it's not clear what was wrong. I'm guessing the coils tried to ride over each other and bound up.
If I'm going to be screwing the barrel together, maybe I can even get rid of the step in it. So then the cap is just a flat disc, and the main body is a flat disc with a cavity.
Still need to add a spline-type feature for the winder to engage, and a ratchet to stop it unwinding freely.
Also, I thought maybe the issue I've been having with the spring turning into a cone is because I'm allowing it to unwind freely. Maybe if it were in an actual mechanism it would work better. This is reminiscent of how I couldn't get the escapement to work by pushing the escape wheel by hand, but then it did work when powered by a weight.
I'd like to be able to tighten the screws all the way on this test barrel, just to get a repeatable setup. So maybe the next step is to shave a bit off the inside of the cap so that it seats on the rim and leaves a larger cavity.
Breguet "souscription" watches
Check out this movement from a Breguet "souscription" watch:
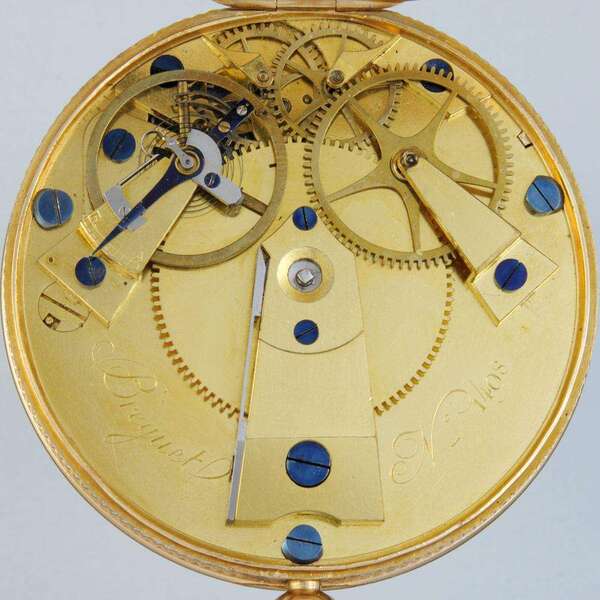
It has only one hand, driven directly off a central barrel, with a train of 3 wheels leading from the barrel to the escapement.
Compare to my latest movement layout:
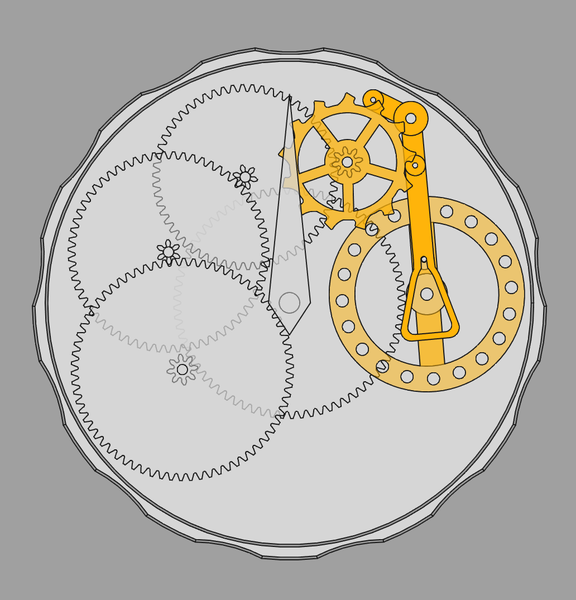
The main differences are:
However I really like the method of using small bridges instead of a second plate, I may steal that. It makes it very easy to see the works, which is like 90% of the reason to have a mechanical watch in the first place.
I was wondering if we could get more amplitude out of the planar verge idea from yesterday if the pallet was made shorter and the balance shaft moved closer to the escape wheels.
planar-verge-10teeth-smaller-pallet.FCStd (but I cocked up the file management in FreeCAD so the latest is actually in
planar-verge-10teeth.FCStd.)
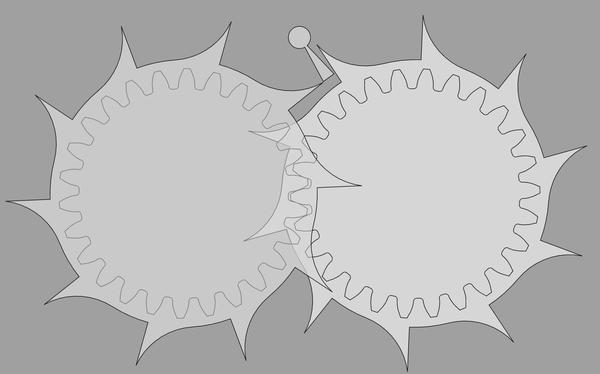
Now with 72 degrees escaping amplitude (up from 52), and not banked until 186 degrees (up from 144). So this is a verge-like escapement that can run with over 180 degrees amplitude!
Oh, actually, it might not be able to run like this, because at the point just before it gets banked...
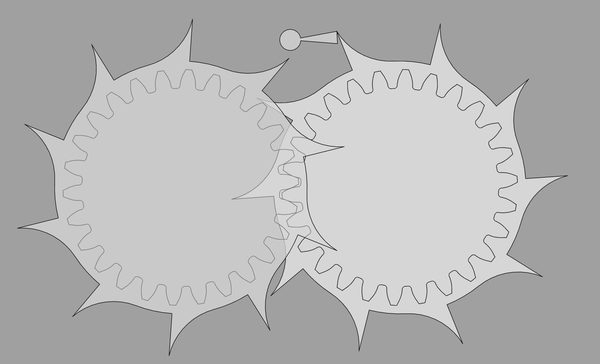
...it looks like the escape wheel is potentially pushing the verge "backwards" (i.e. further around, instead of back towards centre). So this might not run at such a high amplitude, unless it has a hairspring, and even then might not run very well.