Last modified: 2023-11-15 11:29:21
< 2023-11-13 2023-11-15 >It's not getting substantially hot. Obviously it would be hotter without the heatsink, but also I could use a lower voltage.
So I consider this clock "complete", just needs a bracket for the capacitor, and assembly.
And for any more I make:
But anyway, for now, a bracket for the capacitor, and "final" assembly.
Great success. Clock is Finished.
The issue with the binding up is indeed caused by the meshing of the gears. Even with the pallet fork removed it doesn't spin very freely, even though both the barrel and the escape wheel spin freely if only one is installed.
So... probably reprint the escape wheel with smaller module on the pinion? Let's try module 0.7.
And then looking at the spring, I'll first try to re-bend the existing spring to see if I can make it a bit more concentric with the shaft. It probably wants to be stronger though. (Harrison says the balance spring should be 80x as strong as the force from the pallets, whatever that means). Meh, the spring is way too weak, need to make a stiffer one.
Actually, update: the escape wheel does not spin freely with the barrel removed. I've loosened the screws and it is greatly improved now. But the teeth are still binding, so we'll have the smaller escape wheel pinion anyway.
The collet design is very bad. It's very difficult to install, because the spring always gets caught against the end of the shaft. Need to come up with a better design for this.
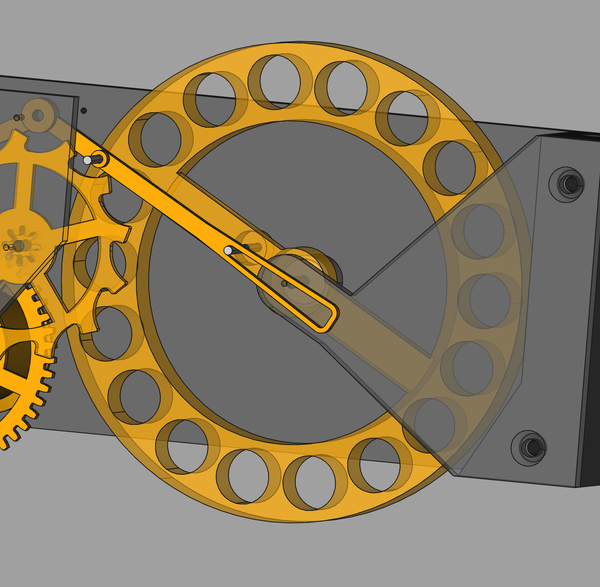
Here's the current status:
I heated the wire up with a lighter and poked it through the collet. This has the module 0.7 pinion on the escape wheel, which works well, and also the new hairspring made out of the Apico lock wire (not piano wire).
The spring force is probably better now, but the balance wheel is not heavy enough, which means it has quite low amplitude (is that right? or have I misunderstood).
I put a lot of drive weight on it to try to increase the amplitude, and some teeth skipped and made a bad noise. I expect it was the barrel against the escape wheel, but could have been the pallets.
I think that for a given drive force, and a given moment of inertia, if you increase the strength of the spring, then you get a higher frequency and a lower amplitude. How can I check that?
Well, if you have no spring, and some drive force, then the wheel will go to the limit in one direction. So adding a spring definitely decreases the distance it travels compared to no spring at all. If you imagine that it reverses once it gets to the point that the return force from the spring exceeds the driving force then it obviously is the case that the amplitude will decrease as the spring gets stiffer. So I think I'm basically right.
So I need a heavier balance wheel. Previously I have done this by making the balance wheel have holes into which I can screw bolts, but that invariably leads to the bolts crashing into some of the other parts, causing great frustration.
I have quite a lot of 9.5mm ball bearings, so I think the plan is to make a balance wheel with a lot of holes around the perimeter, into which I can push ball bearings, and hopefully they can be persuaded not to hit the balance cock.
Maybe I should have given the holes some sort of springy feature so that I have a better chance of being able to install and remove the balls. Oh, well, I should be able to manage.
And then after this is printed, I can fit a 0.25mm nozzle and experiment with that.
Trying to think of a way to remove the balance wheel from its shaft without also disturbing the spring and collet.
Also, I worked out that I want a tool that is like a pair of pliers, except one jaw has 1 rod and the other jaw has 2 rods, like this:
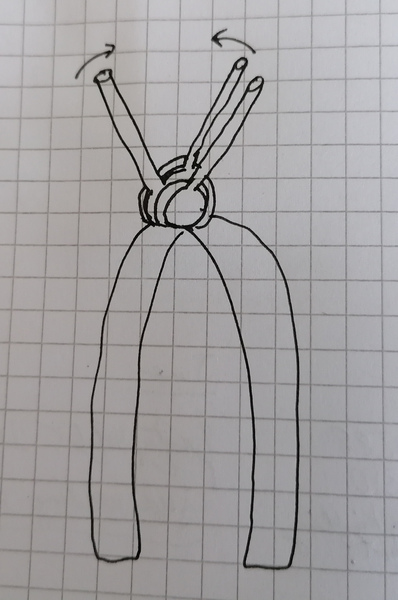
For adjusting springs. You can imagine putting the pliers around a wire and squeezing them together to make the wire bend towards the single rod.
I looked at "wire bending pliers" on Amazon, but can't see any of this design. There are a few similar ones on DuckDuckGo image search, but I can't see where to buy them. Maybe easiest to make my own.
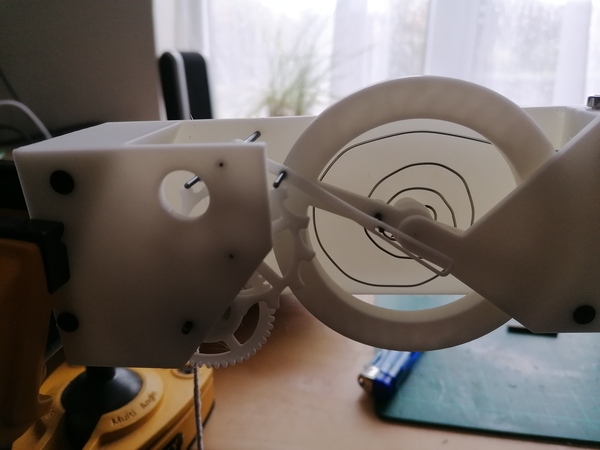
Here's the balance wheel with balls installed:
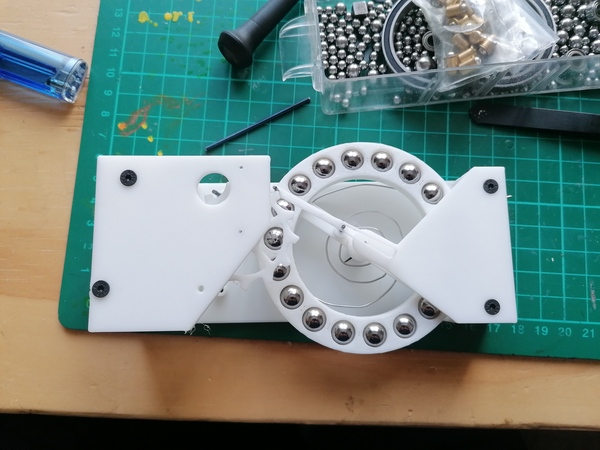
Much more convincing, but predictably the balls scrape against the balance cock. It just doesn't end.
The pallet fork is definitely too flimsy, I can see it flexing when I turn the escape wheel by hand.
So I'm going to print a couple more parts before I switch to the 0.25mm nozzle:
Well I've printed them and fitted them and this seems better than before, but... the amplitude is still really low. If you examine my argument above (that the wheel reverses once the strength from the spring exceeds the strength of the drive) then you'll see that this doesn't change based on the moment of inertia of the balance wheel. Which means the only things we can do to increase amplitude are increase the drive strength, and decrease friction.
I think the spring I'm using contributes to the losses because it is not actually very springy, but I want to record it running as-is, and then put a drop of oil on each of the balance wheel pivots and record it again, and measure the amplitude from the video.
I seem to keep having issues pressing things onto shafts square to the shaft. I am obviously labouring under the misapprehension that the hole will guide it straight. Is this not the case? How are you meant to do this? Do I need to get a small press? Or is it just that when I open up the holes with a drill bit I'm not doing that part square?
Running with the "room spray" bottle as a weight. In none of the 3 cases was there sufficient amplitude for the escapement to be properly locking.
I'm not sure the measurement is particularly good, other than it shows that oiling the pivots/pallets didn't solve the problem.
I observed that putting oil on the pallets seemed to make it worse. It acted like it would run as long as there was not enough amplitude for the escapement to lock, and then when it gains enough amplitude to start to lock it just stops.
Is the issue simply that the spring is using up too much energy because it's not actually a spring?
I installed the 0.25mm profile in PrusaSlicer, and sliced the escapement model with it at 33% scale and 0.1mm layer height:
So this is final watch scale, with module 0.4 gears, and it all looks pretty believable! (Notwithstanding that the pallet fork is upside down). And it says 2h15m print time, not too bad.
If I go down to 16% scale (which is about module 0.2 gears) then the gear teeth kind of disappear. But maybe module 0.4 gears is workable with 3d-printed parts.
I've finally installed a 0.25mm nozzle and I'm going to print out the escape wheel from the 3d-printed prototype, but at 33% scale. Will be interesting to compare it to the brass one.
Lol, the printer is moving a bit fast for my liking! Surely it can't be precise at this speed. This is only a 3-minute print.
There is quite bad elephant's foot, and stringiness, and I would say the gear looks like it would not work. But otherwise it actually looks pretty reasonable! Even if I can't make actual watch parts with this nozzle, a quite small 3d-printed clock movement is definitely viable.
Anyway, let's try and proceed and make a pinion for the metal escapement, even though it looks like it won't work.
I'm pretty impressed with this. Maybe I should be getting nozzles even bigger than 0.6mm for when I'm printing bigger things. The time it takes to swap the nozzle to the appropriate size is nothing compared to the printing time it saves.
I'm persisting with NixOS a bit. I applied the suggested kernel configuration option, but it doesn't seem to have helped.
I did do a sudo nixos-rebuild switch and rebooted, but no dice. I don't know if my configuration hasn't been applied,
or it doesn't do what I want. /proc/cmdline doesn't contain what I wrote, if that is it.
It was https://nixos.wiki/wiki/Touchpad
Also there were a bunch of errors from nixos-rebuild to do with the lines that the installer created for the encrypted
disk. Great stuff. It seemed to continue anyway though.
I've installed vim and git using sudo nix-env -iA ..., but I think this is not the best way because it is not
declarative. Not quite clear how NixOS keeps track of what I've installed this way. Like why not just add it to
configuration.nix or whatever like I would have to do manually?
I can't commit to github, even though I know the password, because the authentication is too annoying now.
Vim comes with some annoying default config, but when I wrote my own vimrc syntax highlighting has stopped working.
I don't normally have to enable this manually... Need to add syntax on.
I don't like that the default bashrc seems to put a newline at the start of the prompt.
Ohhhh, the errors about the missing semi-colon in configuration.nix were actually my fault. It printed out the line
about disk encryption, but that just happens to be the next line after the line I added. I bet this is why the mouse thing
didn't work. Let's try again...
Well I didn't get any errors from nixos-rebuild that time, and now the configuration has appeared in /proc/cmdline,
but the touchpad tap-to-click still isn't working.
Ah, I pasted an xinput command from Stack Overflow, and it pointed out that I was running Wayland. Maybe that is the
problem.
Lol: https://www.reddit.com/r/kde/comments/a4i9fy/is_there_a_way_to_enable_taptoclick_on_wayland/
But the solution from that post doesn't work because I'm not running KDE.
Wooo, I figured it out:
$ dconf write /org/gnome/desktop/peripherals/touchpad/tap-to-click true
Not documented very well at all.
Now let's try out "hyprland". I wonder if I can do that with nix-shell? Or with the QEMU thing?
This page says you can do it with nix-shell:
https://search.nixos.org/packages?channel=23.05&show=hyprland&from=0&size=50&sort=relevance&type=packages&query=hyprland
But maybe that is generic and is actually wrong? Let's try it anyway. Wow, it actually does kind of work, although it launches it in a window instead of giving me a full session. I suppose that is better than I expected, it is probably the most logical thing to do when trying to launch Hyprland from inside Gnome.
It doesn't seem to actually work though, because the Windows key events are hijacked by Gnome instead of operating Hyprland. I'll try the QEMU thing.
I'm sure I read some instructions saying that one of the ways to install a Nix package creates a QEMU VM for it, but I can't find it now. Did I imagine that?
Oh, but the Hyprland docs say running it in a VM is unsupported. Oh well, let's just install it then.
Great, it doesn't show up in the list of desktops you can launch from GDM. Why not just make it work better? Why make it so hard?
I've put programs.hyprland.enable = true in configuration.nix, will rebuild and see what happens. The rebuild
is annoyingly slow given how trivial the changes I'm making are.
That hasn't helped either. Maybe I need to try launching it from a virtual console.
OK, that has worked. It is warning me that I'm using an auto-generated config, so presumably I need to manually edit the config to get rid of that warning.
Great, it comes up with US keyboard layout. It just doesn't end! Why not do the right thing?
What's crazy is it seems to apply the new config as soon as you save it. Not sure that is exactly what I want, because I sometimes save halfway through making some changes.
The config is actually really short and simple, and doesn't have a million pointless key bindings that I'll never use.
It looks like the only way to resize is with the mouse, there's no (default?) key shortcut for entering resize mode. Mouse resize works really well though.
I probably want to add config for:
Everything seems zoomed in really far, like massive text, and if I make firefox floating it is larger than the entire screen. But I didn't see anything in the config for setting a scaling factor.
I don't know if there is a tabbed mode.
Focus follows mouse, which is good.
I've changed "auto" to "1.0" in the monitor config:
monitor=,preferred,auto,1.0
And this has fixed the scaling, although the writing looks a bit blurry, maybe just the font.
Saving the config file doesn't seem to make it run the exec-once lines, which is kind of
what you'd expect, but it does mean that the "magic" config reloading when you save the file
also breaks down as soon as you get off the happy path.
OK, I've installed waybar and hyprpaper and wofi. I now have an info bar with a clock and
battery level meter, but it doesn't launch nm-applet when you click on the wifi network.
Why not just do the right thing?
So I want:
waybar: launch nm-applet from the wifi display; fix the fonthyprpaper: actually use it to set some sort of wallpaperwofi: not look so uglyI've made wofi acceptable by making it run with --gtk-dark.
Great, you can't use the mouse to get a context menu to paste in KiTTY. Why not just do the right thing? You have to use Ctrl-Shift-V.
Also the default colour scheme is somehow messed up so that when text is selected in vim it becomes completely invisible because "inverse video" apparently only half works?
Why does the waybar default config assume some whacko unicode characters? Why not just be
sensible by default?
I think hyprpaper is more complicated than I want, maybe swaybg is better.
Putting exec-once = waybar & swaybg -c '#000000' in hyprland.conf is not enough. Why? It
works fine when run from KiTTY.
I'm parking this for now and going back to clock stuff. Feels like the whole Hyprland thing is just a distraction, and I really need to be learning Nix instead.
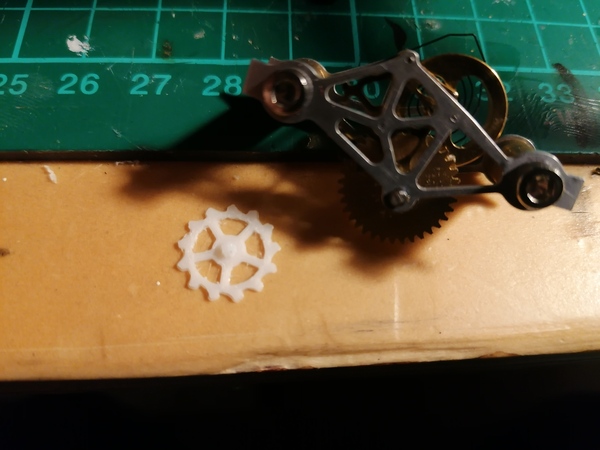
The 6mm square tool steel has arrived, so I could try to make a cutter for the metal pinion. However, given that the 0.25mm nozzle is also here, maybe I should try to 3d print a pinion to use on the metal escapement, just so I can put some weight on it and finally rule out the idea that it might work.
Oh! I made a miscalculation earlier. The 3d-printed escapement was meant to be 3x scale, but I only used 2x the module on the gears. So a 33% scale gear was actually 0.8/3 = module 0.27. The module 0.4 pinion looks much more believable:
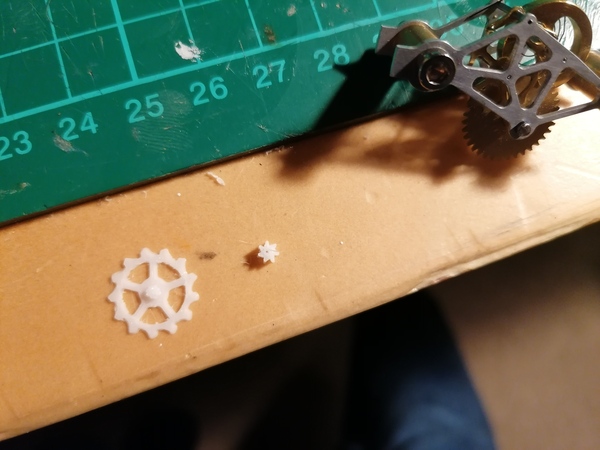
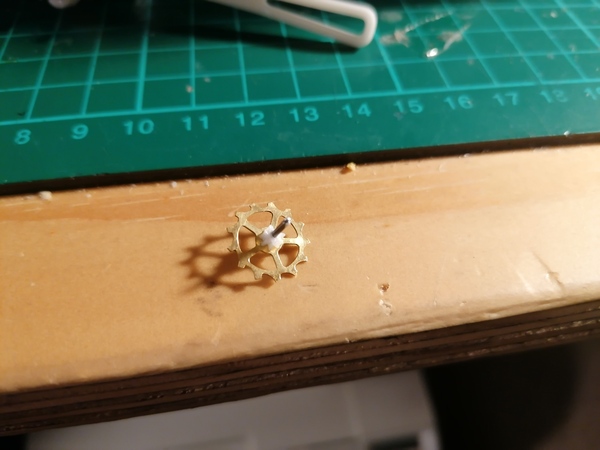
Well it fits, and it meshes! Pretty good success for a first try. This was certainly way less work than getting a metal pinion was. Issues include:
I opened up the bore with a drill bit by hand. Maybe I need a more accurate way to do this.
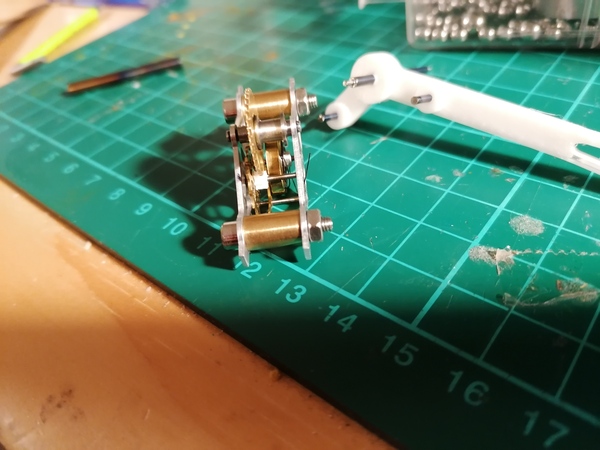
Current problems on the metal escapement are:
I'm going to park the metal escapement again for the time being, pending satisfaction with the 3d-printed one.